


Replacing brake pads is a task that can be found in various online tutorials. However, if you are not 150% certain how to replace brake pads, we strongly recommend bringing your vehicle to our CAA mechanical garage. Whether you’re a DIY enthusiast or not, trust us. With that being said, you may still be curious about how brake pads are replaced. We’re here to walk you through our process in a professional and informative manner.
Chose the right brake pads
First and foremost, before getting started, we carefully select the appropriate brake pads for your vehicle. We always make sure to prepare all the necessary tools and equipment. From mounting hardware to specialized brake lubricant, we leave nothing to chance. In fact, when we mention the importance of relying on professionals, it’s for a reason. Some brake pads contain asbestos, and unknowingly inhaling it can lead to serious lung complications. Therefore, we take precautions and wear appropriate protective gear.
Next, we raise the vehicle. While some may use a jack to lift their vehicle and crawl underneath, it’s important to note that this can be dangerous. Fortunately, at an auto repair garage like ours, safety is never compromised. We then proceed to carefully remove half of the old brake fluid, taking extra care as it can damage the vehicle’s bodywork. We loosen the bolts or nuts at the wheel level.
How to replace brake pads: the calipers
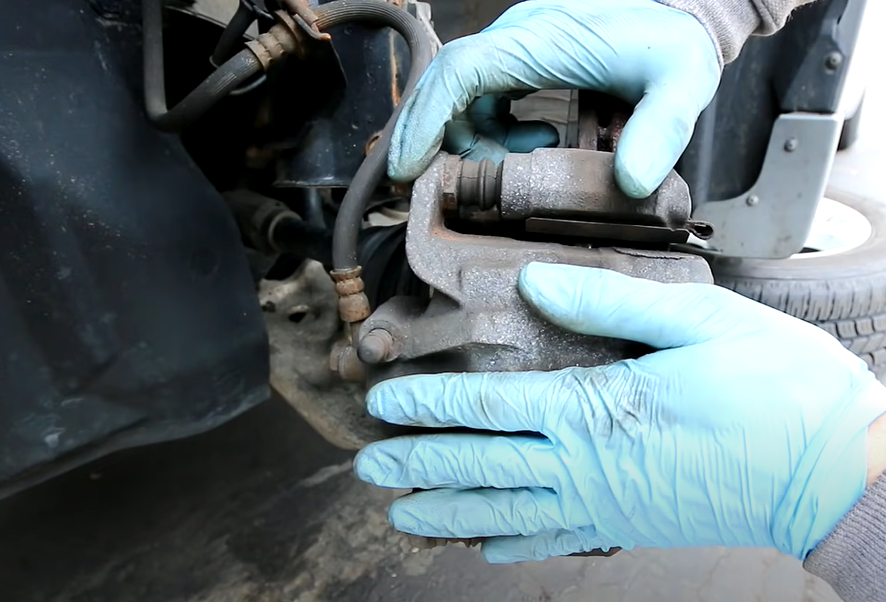
We now proceed to disassemble the calipers. With our expertise in various vehicle types, we know that there are different types of calipers. Some have retaining springs that need to be removed with great care. These springs can be cleaned and reused. Other vehicles may have rear calipers equipped with electronic parking brake actuators. Additionally, most vehicles have floating calipers. In any case, we remove the brake caliper bolts using the appropriate tools, disassemble the necessary components, and take note of the position of shims and mounting.
Then, we move on to removing the old brake pads. After retracting the piston inside the caliper, we take care not to damage the piston, dust boot, or bore. Naturally, we check for any leaks, rust, or scratches on the disc.
Final steps: Cleaning and installing new brake pads
We have specific brake parts cleaners and soft-bristle brushes at our disposal. Removing dirt and rust is a breeze for us. Therefore, we thoroughly clean the caliper and the mounting bracket. Next, we lubricate the caliper guide pins with a specially formulated lubricant.
Finally, we install the new brake pads into the caliper. To prevent any squeaking, we apply a few drops of lubricant. However, we never apply lubricant or oil to the friction material. Tightening the bolts, refilling with fresh brake fluid, and reassembling the wheel are the final steps. And there you have it! It’s not a simple task, which is why it’s best to entrust your vehicle to the nearest mechanical garage.
Practical tip: If you notice any unusual noises or reduced braking performance, don’t hesitate to visit our CAA garage for a thorough inspection. Our team of professionals will be happy to assist you and ensure your vehicle’s braking system is in top condition.
At our CAA Quebec garage, our goal is to provide you with reliable service and maintain your vehicle’s optimal performance. We’re here to answer any questions and help you make the best decisions for your vehicle’s maintenance and safety. Book an appointment with us today.